


Wood Plank Bathroom Countertop
I know it probably seems like I have no rhyme or reason to the order in which I'm tackling the projects in my bathroom makeover. That's probably true. 🙂 I tend to tackle projects as I feel inspired, and yesterday, I was inspired to make a new wood countertop.
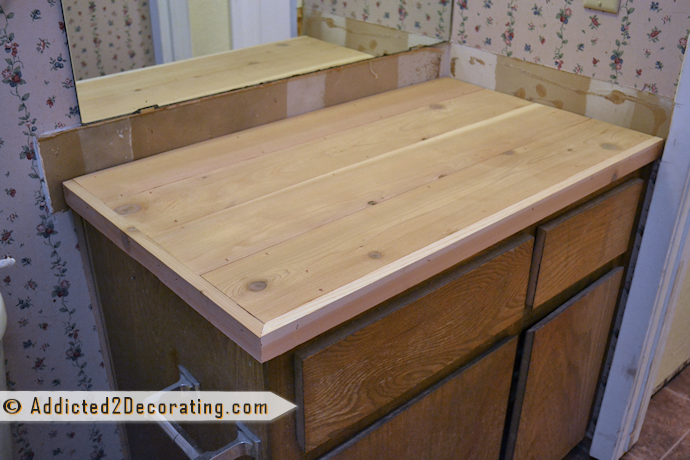
Now before I show you the countertop, you have to put on your "this is a work in progress, and I can envision that it'll look fabulous when it's finished" goggles, because as it is right now, my new countertop looks absolutely hideous next to the unpainted cabinet, and the wallpaper and bare drywall are so distracting. So you'll need to envision the cabinet painted in a light and bright color…perhaps white…or maybe yellow.
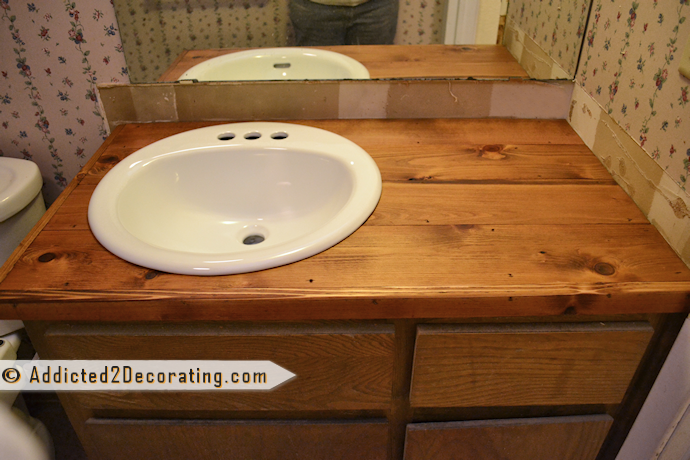
So do you have your goggles on? Here's how my countertop turned out…
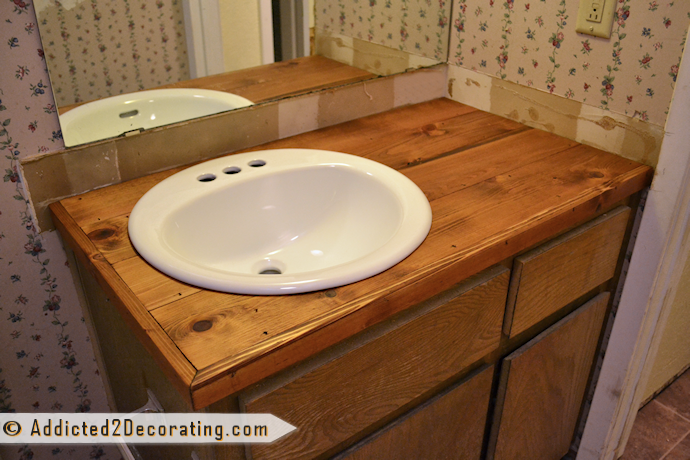
I wanted it to look a bit rustic, so I didn't fill any of the areas between boards like I normally would, and I didn't even fill the nail holes. I like the way those things give the wood a weathered look.
Now because I know that at least some of you have probably lost your goggles, I did my best with this next photo to block out all of the surrounding visual clutter so that you can just see my countertop.
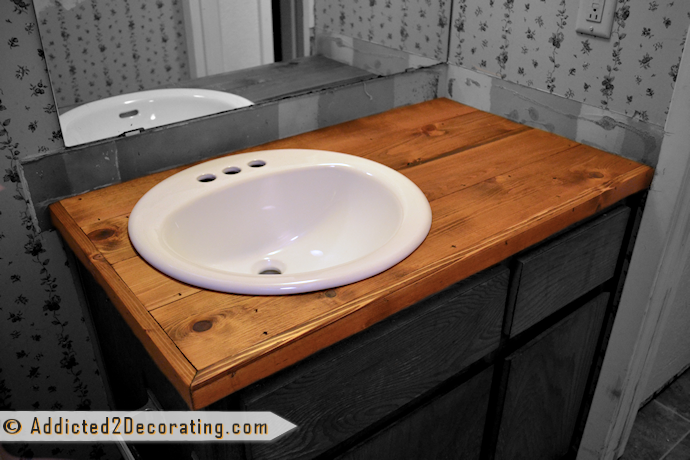
I'm really excited about how it turned out, and I can't wait to finish the bathroom and see my whole vision come to life!
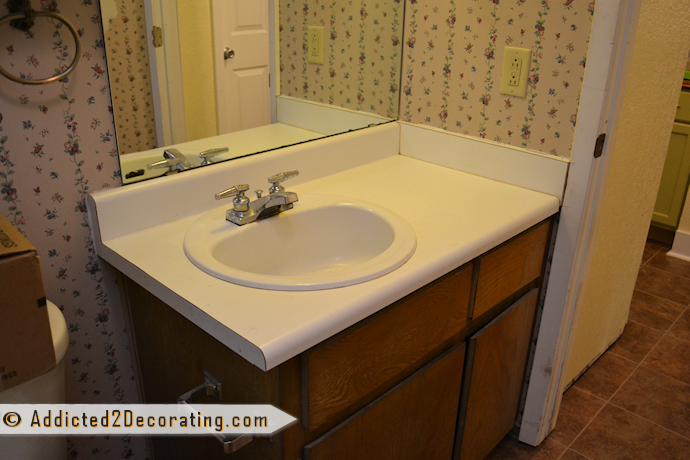
And the best thing about this wood countertop was that it just took about three hours to make, and it cost a grand total of $34.11. And it's a vast improvement over the old generic, apartment-grade laminate countertop that was there!
I just love the warmth and character that wood gives a room!
To make this countertop, I started by removing the old countertop (which just required some unscrewing of pipes, a few whacks with a hammer from underneath the front lip of the countertop, and a bit of prying). Then I placed a piece of 3/4″ plywood on top of the cabinet. This would be the base for the new countertop, and I needed to mark the cut lines.
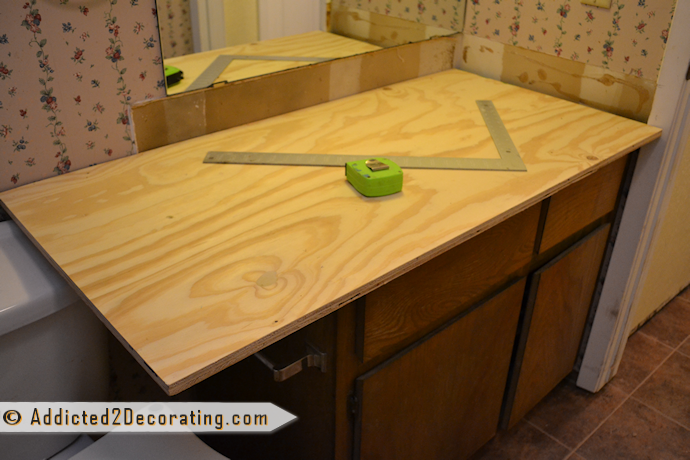
After marking the cut lines, I cut the plywood to size with my circular saw. Then I fit it on the cabinet again just to check my cuts.
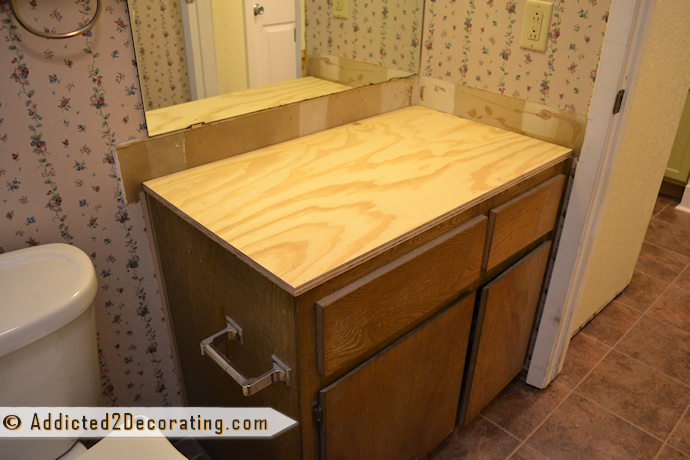
I allowed the plywood to extend past the cabinet about 1/4″ on the front and the side.
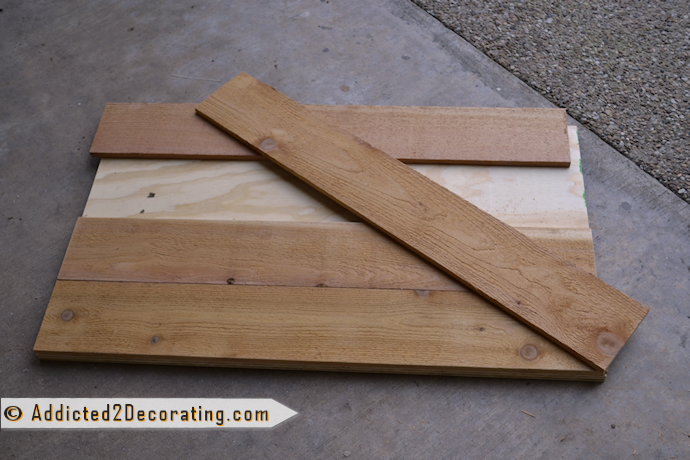
Next, I cut pieces of cedar fence boards to cover the plywood. I used the cheap cedar fence pickets that are really rough, and only $1.97 each. I only needed four boards for my countertop, but I bought five just in case I got them home and found that one of them wasn't usable for some reason.
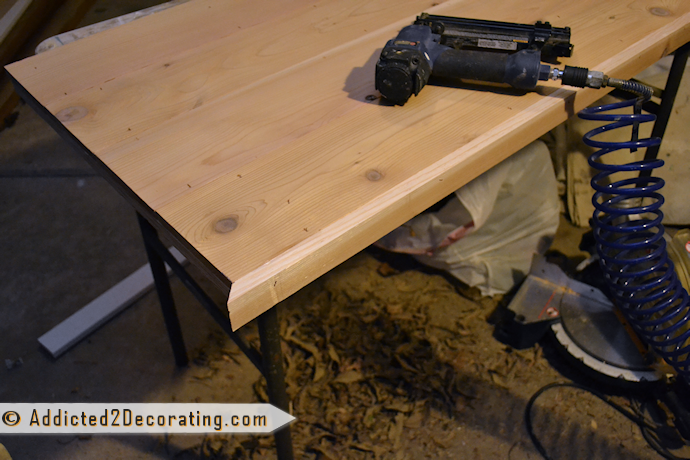
Next, I used Liquid Nails and my brad nailer to attach the cedar fence boards to the plywood.
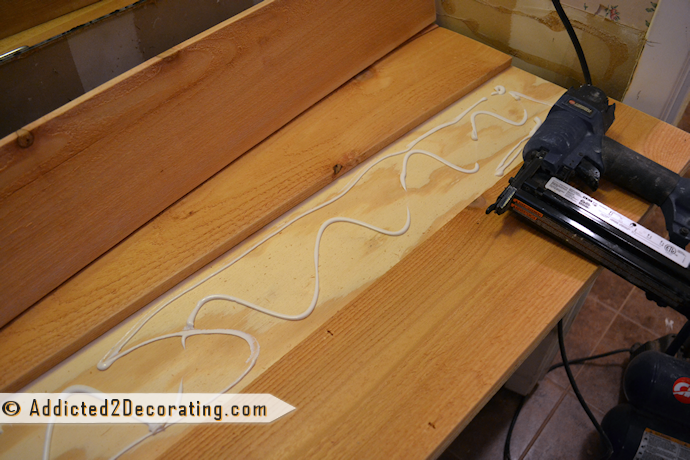
If I were a patient person, I could have just used clamps and weights to attach the boards with Liquid Nails only. That way, I wouldn't have had the nail holes in the countertop. But I'm not a patient person by any stretch of the imagination. And I kind of think the nail holes add character, so I'm okay with them.
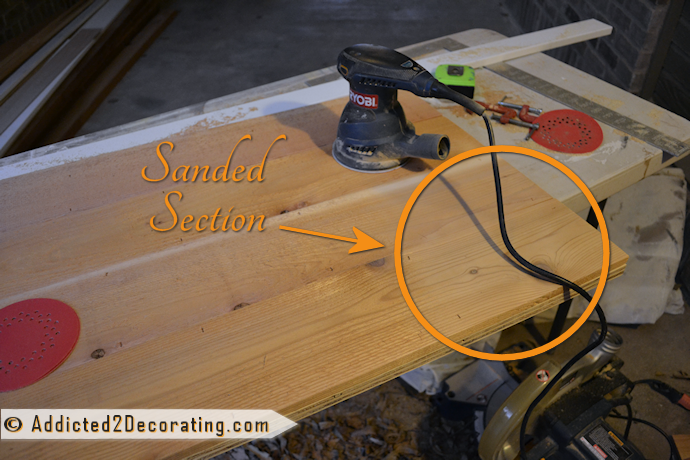
Once the boards were attached, I used my electric sander to sand the entire surface. Here's an interesting fact about cedar fence boards. They may start out incredibly rough, but they sand very easily to a beautiful smooth finish. I'm not sure if you can tell from the photo below, but sanding them not only makes them incredibly smooth, but also lightens them up a bit.
When the boards were reasonably smooth (I didn't need them perfect at this point, because I'd be doing more sanding later), I cut some lengths of 1″ x 2″ cedar lumber to attach onto the front and the side to finish out the edges. I attached them with wood glue and my brad nailer.
And of course, I mitered the corner using my miter saw.
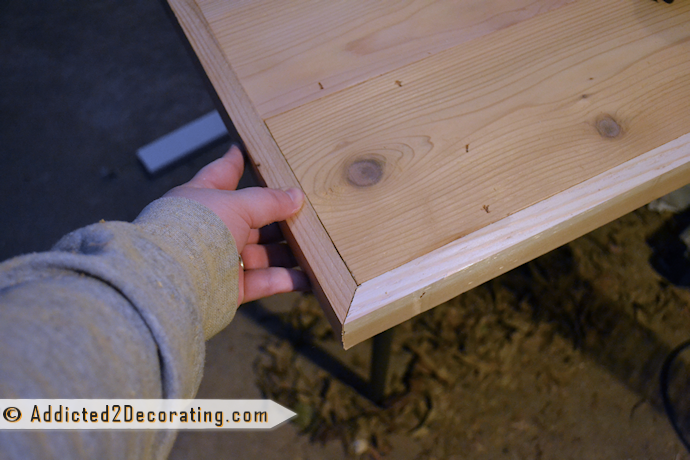
With the edging attached, I tested just to be sure it fit. Note that at this point, if there had been any issues with it being too wide or too long, I could have easily trimmed off any excess from the right side or the back edge using my circular saw. But there was no need for that. It actually fit perfectly! So I gave the entire thing one last thorough sanding with my electric sander.
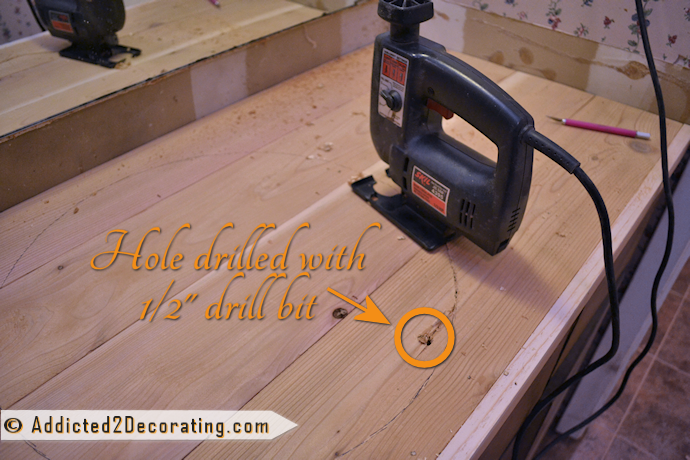
Next I marked where the sink hole would go using the template that came with the sink.
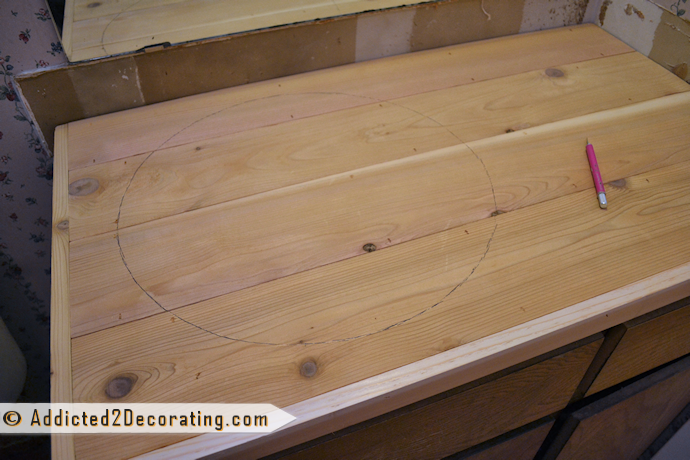
Then after drilling a pilot hole with a 1/2″ drill bit, I was able to use my jigsaw to cut out the sink hole.
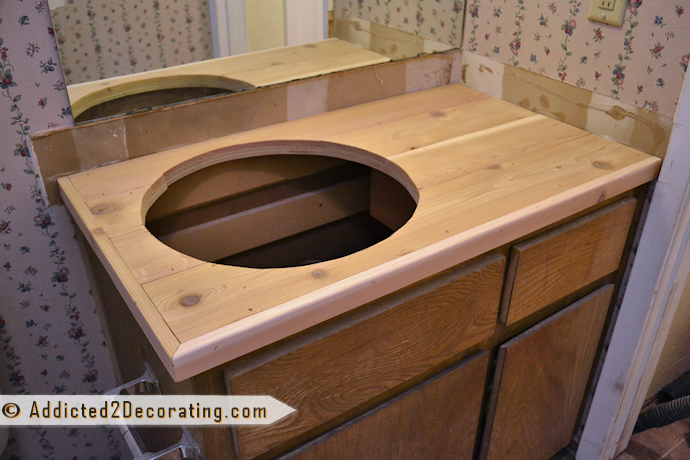
And voila! It certainly wasn't perfect. In fact, far from it. But since I'm using a drop-in sink rather than an undermount, it really didn't matter. I did a bit of sanding just to remove the really rough stuff, but that was about it.
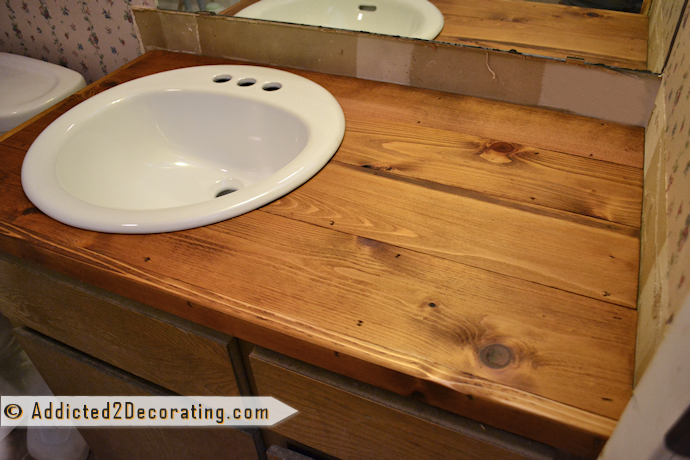
Then it was on to the fun part…the staining!
I new that cedar tends to take stain way differently than oak or pine, so I was kind of at a loss as to what stain color to use. My experience in the past has been that if I use one of my go-to stain colors such as Dark Walnut, it turns almost black on cedar. I wanted my countertop to be a medium brown, so I asked the guy at Home Depot and he suggested that I use Golden Oak stain color. I was hesitant, but I tried it anyway, and I loved the result!
I'll have to wait until I get paint on the cabinet to see if this will be the final color for the countertops. If I use yellow on the cabinet, it's possible that the countertop will need to go darker. Until I know for sure, I won't be able to polyurethane the top. So for now, I'm enjoying my medium brown Golden Oak-stained cedar countertop.
Now I'm more anxious than ever to get some trim and paint on that cabinet!
Here's the cost breakdown for my wood countertop:
- 4 cedar fence pickets – $7.88
- 1″ x 2″ x 8′ cedar board – $2.46
- 2′ x 4′ plywood – $15.65
- Golden Oak stain – $4.78
- Liquid Nails – $3.34
- TOTAL – $34.11
The project required other items, such as nails for my nail gun, wood glue, rags, polyurethane, etc. Those are items that I always have on hand.
So what do you think? Can you envision my new countertop with a pretty painted cabinet? If not, check back soon (hopefully tomorrow) and you won't have to envision it. You'll actually be able to see it! 🙂

Addicted 2 Decorating is where I share my DIY and decorating journey as I remodel and decorate the 1948 fixer upper that my husband, Matt, and I bought in 2013. Matt has M.S. and is unable to do physical work, so I do the majority of the work on the house by myself. You can learn more about me here.
I hope you'll join me on my DIY and decorating journey! If you want to follow my projects and progress, you can subscribe below and have each new post delivered to your email inbox. That way you'll never miss a thing!
Wood Plank Bathroom Countertop
Source: https://www.addicted2decorating.com/bathroom-makeover-day-2-my-35-dollar-diy-wood-countertop.html


Tidak ada komentar:
Posting Komentar